
Uninstalling old versions of .NET Core used to be a tedious process, so much that I had 1.0 and previews of 2.0 still installed.
But now it's super easy thanks to the newly released .NET Core Uninstall Tool.
TL;DR:
Just install the tool, and launch the following command to remove all that is not needed.
sudo ./dotnet-core-uninstall remove --runtime --all
sudo ./dotnet-core-uninstall remove --sdk --all
But if you want to understand more, please keep on reading.
See which version you have installed
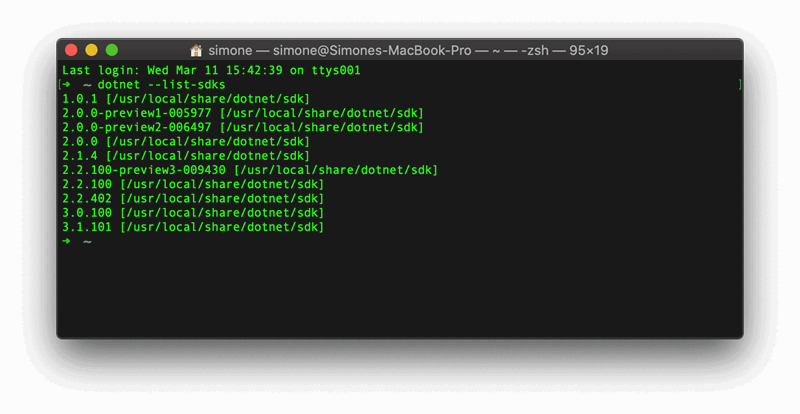
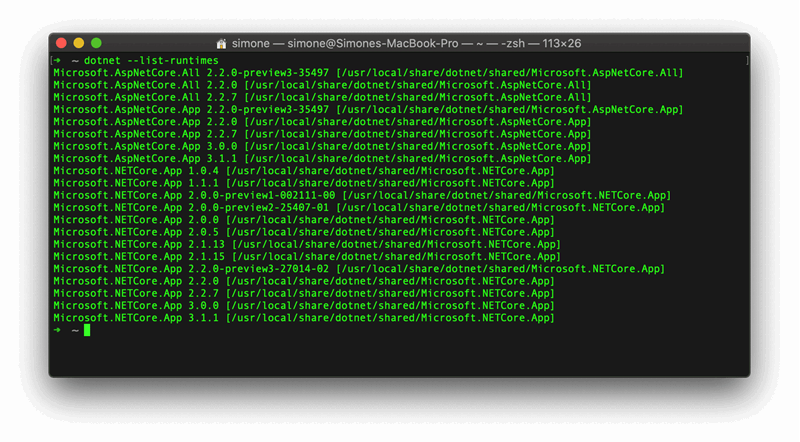
If you run the following command on your terminal you can see all the runtimes and SDKs installed on your machine:
dotnet --list-sdks
dotnet --list-runtimes
On my Mac I have 10 SDKs
and 8 versions of the ASP.NET Core runtime and 13 versions of the NETCore runtime.
If you wanted to get rid of the old version, you had to go and manually delete the content of the folders on Mac and via the "Add or Remove Programs" on Windows.
But now you can have a tool to do it for you, the .NET Core Uninstall Tool.
The .NET Core Uninstall Tool
After you installed it, there are a few commands you can run:
- list
- dry-run (or whatif)
- remove
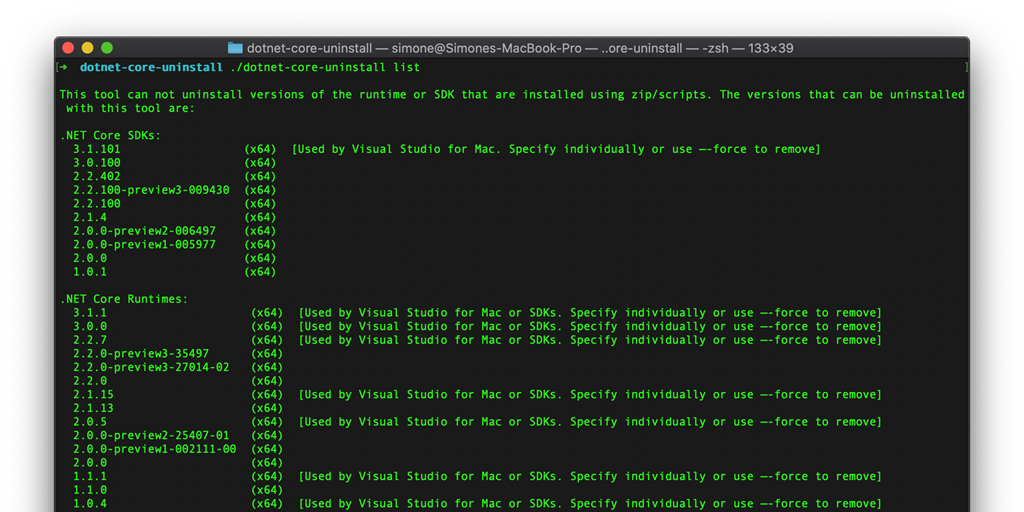
The list command
The list command shows all the SDKs and runtimes you have installed. You can use the options --sdk or --runtime to just show either the SDKs or the runtimes. Or --x64 or --x86 to filter based on the architecture.
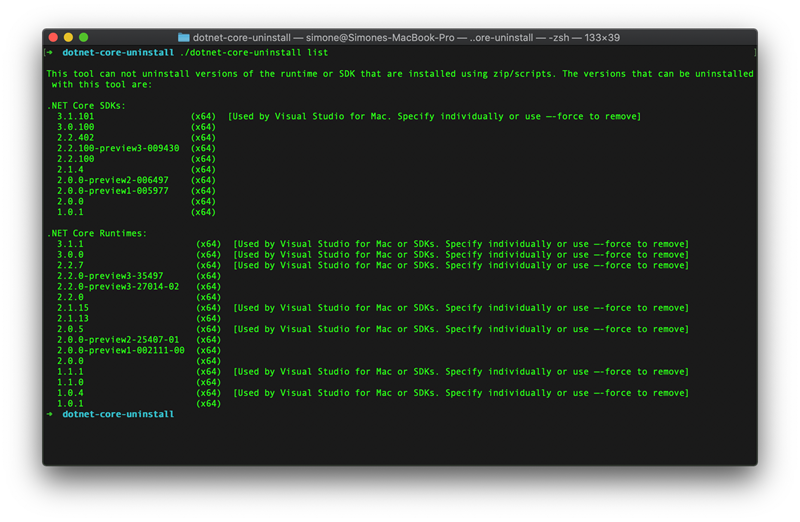
As you can see, some runtimes and on SDK are marked as not safe to remove.
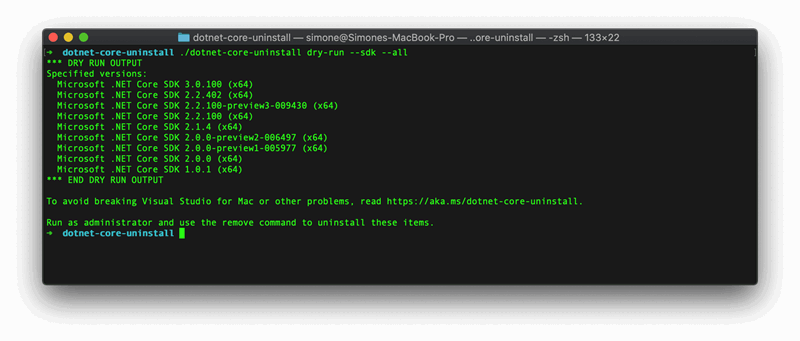
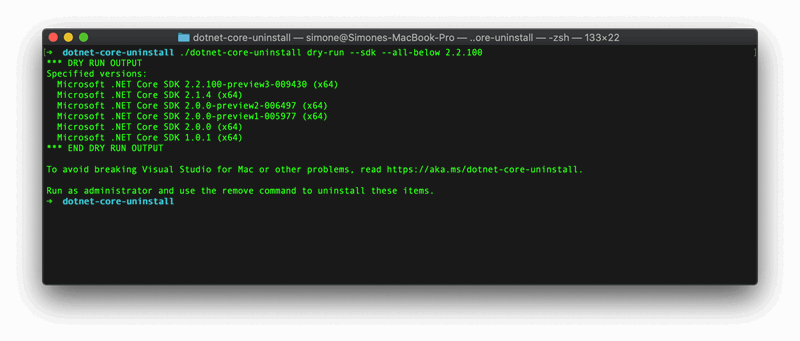
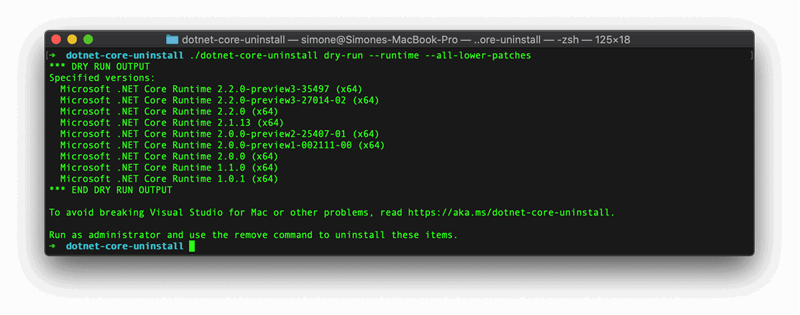
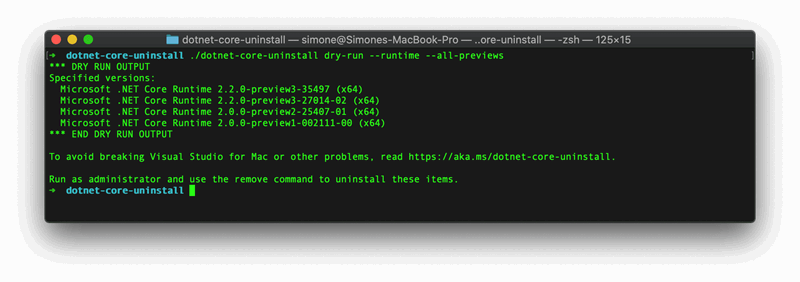
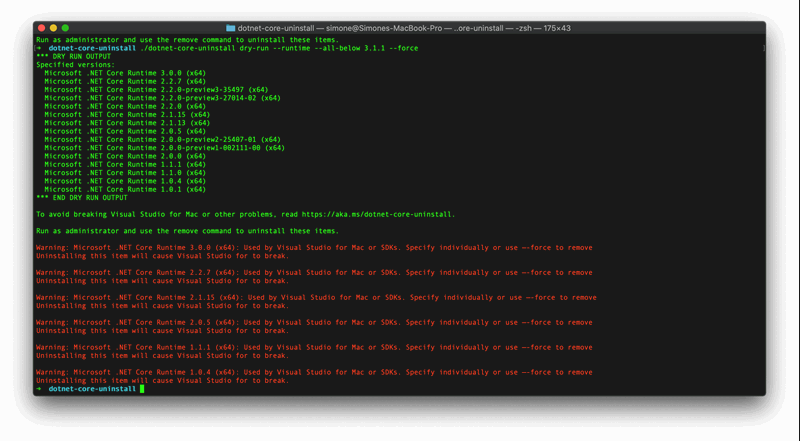
The dry-run command
If you have multiple version installed, you probably don't want to delete them individually. The uninstall tool has a series of options to do a bulk delete. But before you delete everything by mistake, you might want to see what each option does. And here comes the dry-run command, which lists the versions that would be deleted by the remove command when called with the same options. Here some examples:
- --all will delete everything
- --all-below <version>, deletes all versions below the one specified
- --all-but <versions>, deletes everything but the specified versions
- --all-lower-patches, deletes all versions for which there is a higher patch
- --all-previews, deletes all preview versions
- --all-previews-but-latest, just keeps the more recent preview (useful when testing pre-releases)
- --major-minor <major.minor>, deletes all the version of the specified major.minor
Notice that in none of the examples, the versions listed as "not safe" are not appearing. This because if you remove them you might break some functionality. To include them, add the --force option. But don't worry, you'll get a nice red message to warn you.
The Remove command
Once you've found the parameters to delete the right versions, you can use them with the remove command, to actually delete the versions. The only difference is that you need to run the tool with elevated rights (as Administrator on Windows or via sudo on Mac), and that there is a --yes option to skip the confirmation.
Normally, unless you want to start a new application in an older version, you can delete everything except the latest SDK and runtimes. If you want to be sure you don't cause any problem, the safest commands are:
./dotnet-core-uninstall remove --runtime --all
./dotnet-core-uninstall remove --sdk --all
These will uninstall everything that is not needed by Visual Studio.

If you know you are not going to build new projects with older runtimes, you can also just run remove --runtime --all-but 3.1.1 --force to just keep the latest version.